With the supposed upcoming snowstorm this past weekend, I decided that, since I was going to be stuck at home, I would do some cooking. My choice was to make homemade ravioli which we all just love.
For me it's all about getting messy,playing with the dough and working it with my hands. It's a bit of work to make but for me it's just plain fun ! There is something so special about being able to take some flour and eggs and create something so wonderful and delicious that is truly amazing...and do you think my family understands how great that is ? Yes, they most certainly do!
I was fortunate to have been able to buy a pasta maker from a very sweet lady I met about a year ago at a cookware store. I was in the market for a new one to buy and she kindly offered me hers, since she said she no longer takes the time to make homemade pasta for her family anymore. So I was thrilled to have it and have put it to good use !
Ravioli Dough Recipe (this recipe works well for me)
3 cups AP flour
4 eggs
pinch of salt
1 Tbsp. X Virgin olive oil
Ricotta spinach filling:
approx. 1 cup whole milk ricotta
1/2 cup frozen chopped spinach-(thawed and water squeezed out)
1/4 cup good romano cheese( or more to taste)
1 egg
salt, pepper
Place all ingredients into a bowl and stir with fork til well blended.
Ricotta spinach filling:
approx. 1 cup whole milk ricotta
1/2 cup frozen chopped spinach-(thawed and water squeezed out)
1/4 cup good romano cheese( or more to taste)
1 egg
salt, pepper
Place all ingredients into a bowl and stir with fork til well blended.
 I start by beating the eggs with a fork and add bits of the flour, stirring with the fork as I go.
Then loose the fork and get in their with your hands ! This is the fun part ! Work it but be gentle. Use a dough scrape occasionally to scoop the flour back over and into the egg mix . This is the point where, if you've never made homemade dough before you will wonder, how in the world will this pile of mess ever turn into something edible !! It will, trust me!
Once the dough is formed, knead it about 6-8 minutes til it gets kind of elastic. There will be bits of dough that just don't want to join in ! Don't worry, just throw these away to keep your work surface neat and clean.

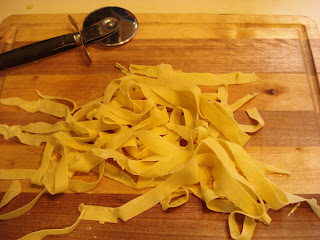
I can't resist, nor can I bear to throw away the bits of dough that don't make it into ravioli. I just cut up the remainder with my pizza cutter into strips, boil a big pot of water and have a snack ! Hey, I deserve it !

So now that your dough has come together, you can cut it in half, wrap in plastic and chill about 30 minutes. In the meantime, get out your pasta maker, bolt it down and set in the widest setting, which is a number 1.

After the big chill, take one of the balls of dough out of the fridge and cut this one in half. Keep the other half wrapped so it doesn't get dry. You will have to flatten the piece a bit, especially and the one end you will be putting into the pasta maker first, so that it will go through.
Once it goes through the first setting, just keep going til your get to the last setting, number 6.
You will probably have to cut this piece in half crosswise. Otherwise it will be way too long to work with !
Once I have this first piece of pasta all rolled out I like to make the ravioli and put into the freezer. Then continue with the rest, til all the dough is rolled out, filled and frozen. Note: If you do decide to freeze the ravioli, sprinkle some cornmeal on a cookie sheet and place in freezer til they are hard, then you can transfer to a nice heavy zip lock bag for future. Although I am sure they will keep for at least 3 months in the freezer, I have never had them around that long !

Once you place a tiny bit of the filling ( about a very scant teaspoonful) onto the dough , placing the filling about 1 1/2 to 2 inches apart, dip your fingertips into some water and run your finger with the water along the edges next to the filling to work as a glue to hold the dough closed. Don't get it overly wet, just a little bit ! You can either place the filling on the dough like this and simply fold over the dough or you can cut the dough lengthwise and place the strip of dough over top of the filled strip. Does that make sense?! Either way you do it, make sure you line up the edges so that the water will hold it closed. Using your fingers, gently press around the filling to work the air out to the edges. This helps avoid exploding raviolis !
Then, using a sharp knife or, as I use, a pizza cutter, cut the raviolis into squares and trim edges to keep neat.

Whether you are using the ravioli frozen or fresh, just drop in gently boiling water and cook til tender. Obviously it will take a little longer if the ravioli are frozen. I make a quick and simple marinara sauce and, once tender, place the ravioli into the sauce and serve with Parmesan cheese. Enjoy !


.jpg)

.jpg)
